
Why You Should Never Buy Another Phone Stand
Every time you upgrade your phone, a new stand is needed. Every time the old one cracks or discolors, you're back on a marketplace scrolling through plastic blocks for $15 plus shipping. The hidden cost of these small accessories adds up quickly, especially when they're often made from cheap materials that break after a few months. But there's a smarter way: 3D printing. The machines and files needed to make your own accessories have become so affordable and accessible that buying another stand no longer makes sense. With a modest upfront investment, you can produce custom-fit stands, cases, mounts, and holders for pennies instead of dollars.
This Is Cheaper Than You Think
A Printer Will Pay for Itself After a Few Things
I used to avoid 3D printing until I realized how cheap and accessible the technology has become. The cost of getting started has dropped dramatically, making it easier than ever to set up a small production line in your living room. A decent beginner-friendly FDM printer, which works by melting plastic filament and depositing it layer by layer, usually runs between $150 and $500. While that might seem like a steep entry fee, consider how many small plastic items you buy each year—phone stands, charging docks, cable clips, game controller grips, and more. Each of those items carries a retail markup of several hundred to several thousand percent. For example, a simple phone stand from a major electronics retailer costs $15 to $25, but the raw material to print it is about 30 to 50 cents worth of PLA filament. After just ten such prints, the printer has effectively paid for itself relative to retail prices.
You can avoid the upfront cost entirely by using a library or makerspace printer, often for a small hourly fee. However, if you plan to use it regularly, owning a printer becomes more economical. Even budget models now include features like auto bed leveling, silent stepper drivers, and fast print speeds—features that were once exclusive to printers costing thousands. The price-to-performance ratio has never been better.
PLA filament, the go-to material for beginners, typically costs $20 to $30 per kilogram. That breaks down to about two to three cents per gram. A phone stand weighs between 15 and 30 grams, so the material cost is around 30 to 90 cents. Compare that to store prices of $20 to $30 for the same basic plastic item. You're skipping markups that can run as high as 4,000%. Running the printer costs barely anything—usually less than a few cents per print in electricity—so you don't even need to factor that in. Once you start making your own parts for under a dollar each, the printer essentially pays for itself after just a handful of prints.
Finding and Printing Designs Is Pretty Simple
Free Sites and Slicing Software Do the Heavy Lifting
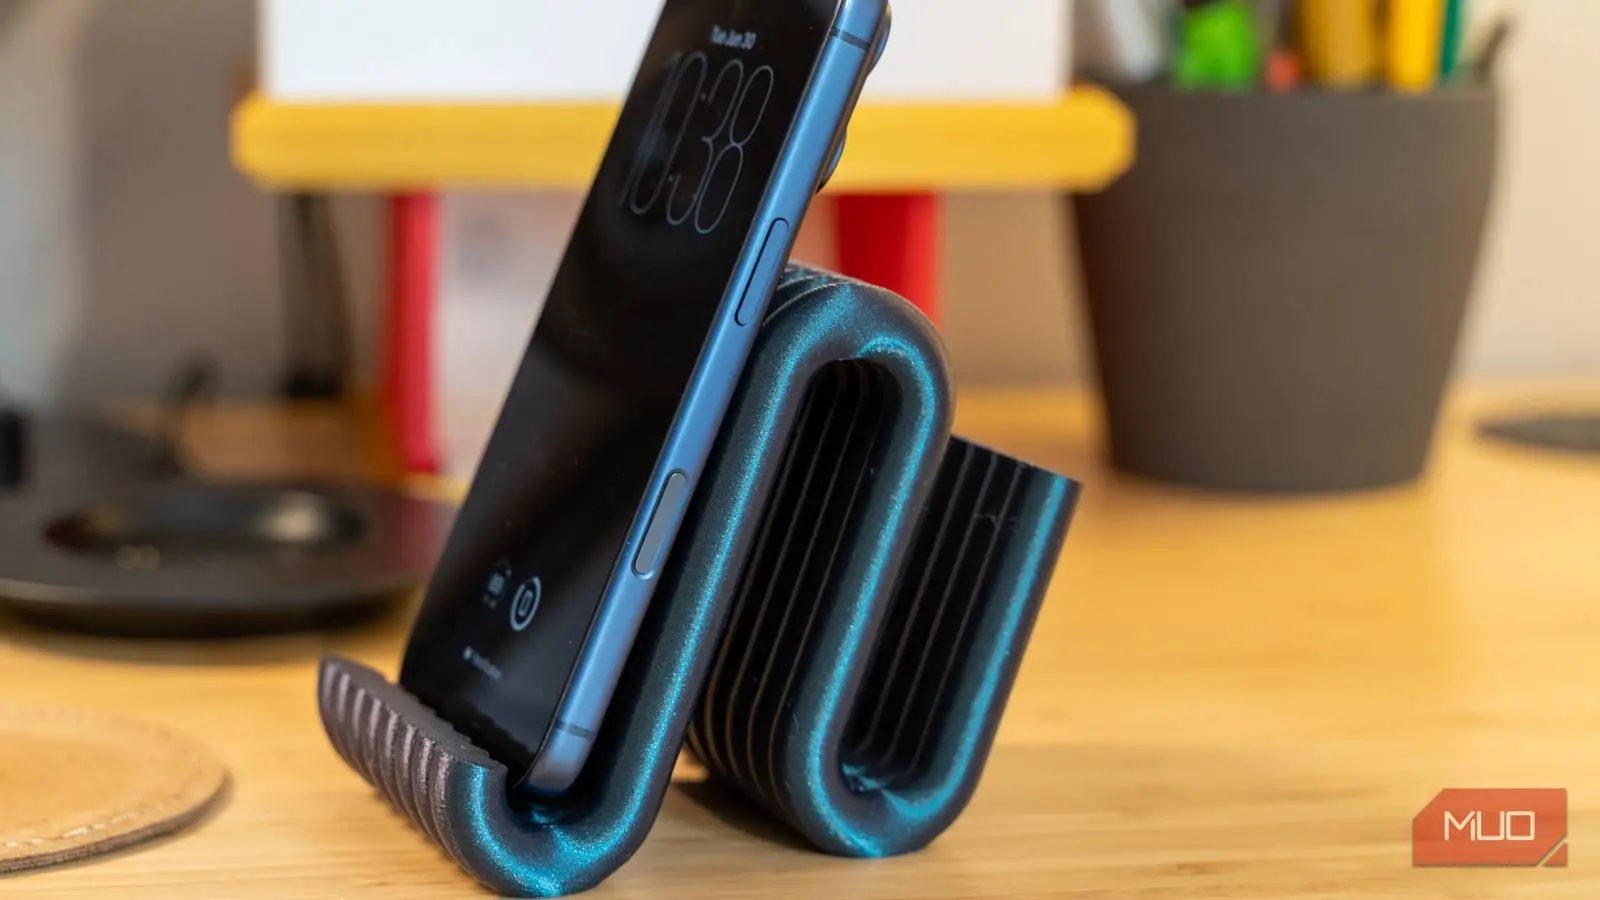
The journey from nothing to a custom-made phone stand is straightforward. Start by exploring the vast world of free 3D model repositories. Websites like Thingiverse, Printables, and Yeggi are loaded with thousands of user-uploaded designs for virtually any device or purpose. You don't need any knowledge of CAD software; just search for what you want—a dual-angle desk stand, a car dashboard mount, or a bedside charging dock with cable management. Many designs are cleverly engineered to print fully assembled, folding open directly off the print bed without extra work.
Once you find a design, download the STL file. But that file isn't printable yet; it must be processed through slicing software—the essential middleman between the 3D model and the physical object. Programs like Cura or PrusaSlicer load the STL and slice it into hundreds of thin horizontal layers. You then adjust settings to balance strength, speed, and material use. For a phone stand, you don't need it solid all the way through. Set the infill between 10% and 30% using a pattern like gyroid or cubic, which creates internal air gaps that save plastic while maintaining structural integrity. To make the outer surface durable, set two or three perimeter walls (shells). The slicer then generates G-code—the precise instructions for the printer's movements, nozzle temperature, fan speed, and retractions. Most phone stand prints take under an hour, weighing only 15 to 30 grams. With free community designs and slicing software handling the complexity, anyone with a printer can skip retail markups and produce their own accessories faster and cheaper than expected.
The Plastic You Choose Makes a Big Difference
You Will Probably Ruin a Few Prints at First
Plastic selection is critical. PLA is the best starting point because it's forgiving to print with and offers decent tensile strength, but it's brittle and softens at around 130 degrees Fahrenheit. If you print a phone mount from PLA and leave it in a hot car, it will likely warp or deform. For greater durability, move to PETG, which has higher impact resistance and some flexibility, or ABS, which withstands heat much better but shrinks significantly during cooling, causing warping and layer adhesion issues.
Warping is one of the most frustrating hurdles. As layers cool, uneven shrinkage can pull corners off the build plate, ruining prints hours later. Preventing this requires careful calibration and surface preparation. The Z-offset must be correct to ensure proper first-layer adhesion. The build plate should be cleaned thoroughly—wash with dish soap and then wipe with isopropyl alcohol to remove oily residues. In the slicer, disable the cooling fan for the first few layers so the plastic settles and bonds before air hits it. A heated bed (around 60°C for PLA, 80°C for PETG) also helps reduce thermal stress.
Other common pitfalls include under-extrusion (caused by partial nozzle clogs or incorrect filament diameter settings) and stringing (excess oozing during travel moves). These are solved by adjusting retraction settings and ensuring the filament is dry—many materials are hygroscopic and require drying before use. Patience is essential: you may ruin two or three prints while dialing in your setup, but each failure teaches you something. The cumulative savings from DIY accessories quickly outweigh these small setbacks.
Don't Waste Your Money on Premium Stands Again
None of this works without some patience. You'll waste a print or two figuring out bed adhesion, and PLA won't survive a hot car no matter how careful you are with settings. If you need heat or impact resistance, PETG or ABS are required, and both bring their own calibration headaches. For items you'll replace or redesign multiple times, however, the math is unbeatable. The combination of low material cost, free designs, and the ability to iterate rapidly makes 3D printing the ultimate alternative to buying overpriced plastic accessories. Every cracked stand or obsolete charging dock becomes an opportunity to print an improved version—customized to your exact preferences and at a fraction of the retail price.
Source:MakeUseOf News